Tuesday, November 19, 2013

Pizza Time


Since we moved to New Jersey, we've been enjoying a significant upgrade in pizza quality. Sorry Midwest, but you've got nothing on the thing-crusted masterpieces being slung about in this area. Not to mention the ability to buy a slice here instead of a whole pie!

 Now, I say all of this with a caveat.  My wife no longer likes to order pizza out.  We started making pizza earlier this year, and honestly, it’s a much better option.  It’s cheap (you can make 2 cheese pizzas for about $5), lends itself to endless customization, and takes very little time and cleanup.  Win win!  This is a recipe of our current favorite, a white pizza that has consumed all of the arugula we receive in our CSA box.


White Pizza w/ Goat Cheese and Arugula

makes 2 pizzas

1 pound raw pizza dough (look near the cheese section or the freezer section)

5 ounces goat cheese crumbles
3 onions, sliced thin
1 tablespoon olive oil
8 oz arugula
1-2 tablespoons balsamic vinegar
4 tablespoons olive oil or an herbed oil (I like Wegmans basting oil)

 Preheat oven to 500°F.  Move oven rack to lowest position, and place pizza stone on rack.  Allow oven and stone to heat for at least 45 minutes. If you do not have a pizza stone, you can use an inverted sheet tray, though it will not take as long to heat up.


 In a large skillet, heat 1 tablespoon olive oil over medium heat and add onions along with some salt. Cook, stirring often, until onions begin to brown and soften, about 10 minutes.  Lower heat and continue cooking onions until very brown, 10 more minutes.  If the onions start to burn, add ¼ cup water or white wine to aid in caramelization.  Remove from heat when done.


 Roll half of pizza dough on a floured surface.  Roll thin, and if it springs back, allow it to rest a few minutes before continuing to roll.  Place dough on a piece of parchment paper (helps it to not stick) and roll to desired shape and thickness.  Brush with with two tablespoons of the herbed oil.  Top with ½ of the onions and half of the goat cheese. Bake in oven, checking after 6 minutes for doneness.  Puncture any bubbles to ensure a flatter crust.  Cook until you achieve desired crispiness.  Remove and transfer to either another oven set to low, a warming drawer, or cover with foil (or eat it while you cook the other pizza).


 Toss arugula with balsamic vinegar.  Top pizzas evenly and slice. Enjoy!

Tuesday, January 29, 2013

White Bean Dip

Have I been slacking on blogging?  Yes.  Do I know this?  Yes. Am I throwing out a new recipe for the Superbowl with the hopes of blogging more soon?  Absolutely.  Enjoy!

White Bean Dip

1 16-oz can cannellini beans, drained and washed
juice of half a lemon
1 clove garlic
dash cayenne pepper
1/4 teaspoon taragon, basil, or sage
3 T olive oil
salt
pepper
basil, parsley, or sage to garnish

In a food processor, blend beans, lemon juice, garlic, cayenne, and herbs along with a good dose of salt and pepper.  While blending, add the olive oil.  Season to taste, garnish with herbs.  Serve with pita chips.  Can be made up to 3 days ahead.

Tuesday, September 25, 2012

Corn Chowder

One (admittedly minor) thing I was worried about when leaving Indiana was the availability of fresh corn. I had grown used to getting corn from numerous cart vendors throughout town and it always being delicious. It’s what Indiana did well. Here in New Jersey, it seems they have taken the concept of a farmers market and turned it up a few notches. I can find lots of fun foods like fruits, vegetables, fresh breads, pastries, pickles, and so much more. It’s expanded my cooking options quite a bit.

As fall sets in, corn is becoming scarcer as its season ends. Unless you were smart enough to blanch your corn and put it in baggies for freezing (I was not). One of the last times I got some, I made this “lighter” corn chowder with bacon and potatoes. It’s quite a good recipe and uses blending part of the soup as the thickener for the remainder. I have a recipe for pot roast that does the same thing with the gravy, but that’s another post.

To get a bit more char flavor in your soup (it’s quite good), I recommend cooking one or two of the ears over a hot grill and then letting them cool before you proceed.

Corn Chowder
Adapted from Cooks Illustrated

8 ears corn, husked and silk removed (2-3 grilled)
2 tablespoons butter
1 onion, diced
4 slices bacon, chopped
1/2 teaspoon dried thyme
1/4 cup flour
5 cups water
1 pound russet potatoes, peeled and chopped into 1/2 inch pieces
1 cup half and half
1 teaspoon sugar
1/4 teaspoon dried basil
salt and pepper

Using a sharp knife, cut kernels from corn and place in a bowl (~5-6 cups).  Holding the cobs over a second bowl, use the back of a butter knife or a spoon to firmly scrape the remaining pulp from the cobs (~2 cups). Transfer the pulp and any associated liquid to a kitchen towel set in a medium bowl.  Wrap the towel tightly around the pulp and squeeze until dry.  Once dry, discard pulp and save the resulting corn juice (~2/3 cup).

Melt butter in a large pot over medium heat; add onion, bacon, thyme, 2 teaspoons salt and some pepper, cook while stirring often until onion is softened and almost brown, about 10 minutes.  Add flour and cook, stirring constantly for 2 minutes.  Add water and stir, bring to a boil.  Add corn kernels and potatoes, bring to a simmer.  Reduce heat to a bare simmer and cook until potatoes are soft, ~15 minutes.

Ladle 2 cups chowder to blender and process until smooth (be careful of splashing).  Return puree to the pot, add half and half and return to a simmer.  Turn off heat and stir in corn juice, sugar, and dried basil.  Season with salt, pepper, and any more sugar for sweetness.  Enjoy.

Tuesday, September 4, 2012

Fajitas!

Thanks to finally getting moved into the house, I have regained possession of my grill. It pains me that the first time I was able to grill this summer was the end of July. And I probably shouldn’t have grilled that night, as it was in the face of a huge storm that knocked a tree onto the roof of our neighbor’s house.
I wasn’t going anywhere with that, I just wanted to show the picture. Back to food. Fajitas are a staple in my house during the summer, easy to make, grill, and throw together on pretty much any night. I prefer steak, though chicken, shrimp, or veggie work quite well. If you’re going for beef, stick to something thin and designed for grilling, namely flank or strip steak. NJ supermarkets thankfully carry both; I could never find strip steak in a grocery store in Indiana. However, if you are fortunate enough to live near a Mexican grocer with a meat counter, chances are they have some and it’s cheaper than anything you can get in the store.

For toppings, I keep it simple with just grilled peppers and onions, salsa, and maybe an avocado. A fajita should stand on its own, with little to get in the way of the meat and tortilla. Hope you enjoy.

Fajitas (Adapted from Alton Brown)
Serves 4-6 

1/2 cup olive oil 
6 tablespoons soy sauce
1 teaspoon garlic powder
1/4 cup lime juice
2 teaspoon red pepper flakes
1 teaspoon ground cumin
1/4 cup dark brown sugar
2 pounds flank steak, cut into four pieces (with the grain)
2 onions, peeled sliced into thick rings
2 green bell peppers, stems removed and seeded
15-20 flour tortillas
Salsa and sliced avocado for passing

Combine first 8 ingredients in a bowl and mix until smooth. Pour marinade over steak in a zip-top bag or pan and marinate for 1 hour. Preheat gas grill to high (or get a charcoal grill nice and hot). Grill onions and pepper (you can lightly oil them first if you wish) until soft and slightly blackened. Slice onion rings in half for strips, and thinly slice the peppers. 

Place steak on grill, cooking on each side for 6-7 minutes or until internal temperature reaches 125°F (for medium rare) or 135°F (for medium). Let rest for 5-10 minutes, and then slice thin. Warm flour tortillas on grill (in foil) or in a low oven. Assemble and serve.

Tuesday, August 28, 2012

Spinach Manicotti

Hey Everyone!

After a long spell of silence, I return to the blogosphere. New kitchen, new location, new recipes! I moved out of Indiana and to the east coast, more specifically New Jersey. Both wife and I relocated here for employment opportunities (no more grad school for her!) and we bought a house, so now I have more space to cook and make a mess.

The cuisine options in NJ are extremely different than what I was used to in Indiana, and as expected, there’s a lot of Italian out here. So what better place to start? After failing to find some ingredients for our original dinner plans (enchiladas), I called an audible and decided to make manicotti.

More to come over the next weeks!

Spinach and Ricotta Manicotti 
Serves 4

1 package dried manicotti
15oz container part skim ricotta cheese
1 10oz package frozen spinach, thawed
2 oz Parmesan cheese, grated
8 oz Mozzarella cheese, shredded
1 teaspoon dried basil
1 teaspoon dried oregano
Salt and pepper
1 16oz jar of your favorite pasta/marinara/tomato sauce

Preheat oven to 350°F.

Boil pasta according to directions. Let cool on sheet pan. Meanwhile, in a medium bowl, combine the ricotta, Parmesan, basil, oregano, and some salt and pepper. Using your hands or a dish towel, wring out most of the moisture from the spinach. Add the spinach and ~1oz of the Mozzarella to the bowl, mix to combine well. If the mixture seems somewhat dry, add 2 tablespoons water to help combine. Transfer filling to a zip-top bag and seal closed.

In a 13x9 baking dish, add a small amount of the sauce and spread to cover the bottom of the pan. Cut one of the corners off the zip-top bag and pipe the filling into the manicotti. Arrange in a tight single layer and cover with the remaining sauce. Top with Mozzarella and cover with foil. Bake for 20 minutes, remove foil, and bake for 20 minutes longer or until cheese is bubbling.

Thursday, March 1, 2012

Mushroom and Gorgonzola Risotto


My wife has finally convinced me that Bitchin Kitchen is a show worth watching.  I’ve become a bit disillusioned with cooking shows (except you Good Eats, and you will be sorely missed) because they more or less offer the same style, recipe types, and ingredient base.  It’s just not what I’m looking for right now.  But Bitchin Kitchen is not a cooking show.  It’s a half hour crazy-fest that just happens to also feature food.  Even if you don’t cook, I highly recommend catching an episode for entertainment.  I especially enjoy her side kicks.

Most of the show centers around Mediterranean food, and her risotto recipes especially stand out.  This is my melding of her ingredient suggestions with my risotto recipe.  Enjoy.

Mushroom and Gorgonzola Risotto
Adapted from Bitchin Kitchen

1 tablespoon olive oil
1 tablespoon butter
1 onion, diced
2 garlic cloves, minced
1 pound portabella mushrooms, chopped
2 cups Aborio rice
½ cup white wine
2 ½ cups low-sodium chicken stock
2 ½ cups water
⅓ cup Gorgonzola cheese, crumbled
¼ cup Parmesan cheese, grated
salt and pepper
Parsley, to garnish

In a small pot over medium low heat add the water and chicken stock until simmering.  In a heavy bottomed pan (I like a dutch oven, but any heavy pot will do), combine the butter and oil over medium heat until foaming, add the onion and some salt and cook for about 3-5 minutes. Add the mushrooms and cook until the mushrooms begin to brown, about 7-8 minutes.  Add garlic and cook 30 seconds.  Add the rice and stir constantly until the rice is slightly colored and smells toasted. This will take about 3 minutes. Add the wine and stir until absorbed. Reduce the heat slightly and add about 1 cup of the stock, stirring constantly until all of the stock has been absorbed. Make sure the mixture is bubbling slightly but not boiling.  Repeat until about 20 minutes have passed and taste rice (note: you may not have to use all the stock/water). When slightly al dente add the Gorgonzola and Parmesan.  Season with salt and pepper.  The risotto should be slightly runny and not extremely thick.  Garnish with parsley and serve.

Monday, February 27, 2012

Little Indiana

I recently did an interview over at Little Indiana: http://littleindiana.com/2012/02/indiana-blogs-cooking-with-wolfes/

Check out the site for extremely useful articles on what to do and where to go!

Thursday, February 16, 2012

What I'm Drinking-Winterfest Edition


I attended Winterfest a few weeks ago, one of the two large beer festivals in Indiana put on by the good people at the Brewers Guild of Indiana.  If you have never attended, I highly recommend it.  Not only did I try some amazing beers, I learned a lot from the brewers taking time to actually talk about their beers as well.  It was fantastic.

In case you have not heard, Indiana cleaned up this fall at the Great American Beer Festival.  By “cleaned up”, I mean won more medals than any other state.  That’s impressive no matter how you spin it.  I’ve become more familiar with some of the breweries in the state, and it’s been quite a pleasure trying out the new varieties they offer.  Here are a few of my favorites, and most can be found at local bars or stores.

Sun King Osiris Pale Ale: Best “everyday” pale ale of any that I drink. It's dry hopped but not to bitterness. It's refreshing and extremely balanced (also, for the record, everything Sun King brews is awesome).

Bier Brewery Fuggit Stout: This won last fall's Brew Bracket II event. It's rich and creamy without being dry or overly sweet

Triton Stout and IPA: This brewery just popped up about a year ago, and I'm loving their beers. Their stout is especially good, and it's nice to see a brewery brew a stout as a house beer. Their IPA is citrusy and easy to drink. I think we can expect bottles in the near future.

People’s Hopkilla: Lafayette's own! I was hard on them when they first started up, but they have really come a long way. This is a double IPA that's easily one of the best brewed in the state. It's aggressive and full of flavor.

Upland Gilgamesh: I learned at Winterfest that I enjoy sours. Sadly, this was a one-shot only tasting for me, as this is a very in-demand and rare beer, but man was it good! Sour and fruity, it gave me the same feeling when eating grapefruit.

3 Floyds Gumballhead: A wheat beer with a nice hop flavor at the end, this is one of the best year-round beers they produce. Good for people looking for something a bit lighter.

Brugge Harvey: Another sour (I was on a roll), quite delicious and tart. Only offered at the Brugge restaurant, but you know, they have great mussels and beer, so it's easy to make an excuse to go here.

Sun King Cream Dream IV: This beer starts as a cream ale but then gets the hell hopped out of it. Not only is it amazing and flavorful, I was lucky to have it out of a firkin, which gave some more complexity from the yeast.

Figure Eight Ro Shampo: I just discovered this brewery, and this red ale is my current favorite. It's slightly bitter, which I enjoy, and the malt on it is quite good.


Flat 12 Walkabout Pale Ale: A single hop pale, this ranks up there with Osiris as my favorite current pale ale. It's wonderfully fruity and bright.

That's just a sampling of what Indiana beers are great. Next time you're out, pick one up, you certainly won't be disappointed.

Tuesday, February 7, 2012

Three Bean Soup

Over the holidays I was fortunate enough to have some delicious food, and a lot of it not prepared by me (win win). For Christmas eve we had smoked turkey from D&R market. It was delicious, and thanks to my tendency to get sick during the holidays, I got to take the bones home as a consolation prize.

It’s tradition for me to make stock from some leftover Christmas animal, and turkey is no different. Stock making is something that is simple, easy, and yields healthier stocks you can freeze and use whenever you want. To make this stock, I browned the bones, added 1 quartered onion, 2 chopped carrots, 2 chopped celery stalks, 4 cloves of smashed garlic, 2 bay leaves, parsley stems, 2 sprigs of thyme, a bit of salt (not much, it’s already smoked and therefore has some salt), and enough water to cover (10-12 cups). Bring to a boil and simmer for 3-4 hours. Drain, let sit to skim off fat, and use for soups, stews, etc.

While searching for a quick, warm dinner, I came across this recipe from The Other Side of Fifty, another Indiana food blog. I love the idea of using the refried beans as a thickener! It turned out great, though I did add a cornstarch slurry at the end to get a bit more body out of the soup.

Three-Bean Smoked Turkey Soup
Adapted from The Other Side of Fifty

1 T olive oil
1 onion, diced
2 stalks celery, diced
2 large carrots, diced
3 garlic cloves, minced
1 T chile powder
1 chipotle pepper in adobo sauce, finely diced
1 T tomato paste
6 cups smoked turkey broth or other poultry broth
1 15-oz can great northern beans, drained and rinsed
1 16-oz. can black beans, drained and rinsed
1 16-oz. can non-fat refried beans
3 tablespoons cornstarch dissolved in 5 tablespoons broth or water
salt and pepper (if using smoked turkey broth, you may not need salt)
Sour cream


Add olive oil in a large pot heat over medium high heat. Add the onion, celery and carrots and cook for 7-8 minutes until softened. Add the garlic, chili powder, chipotle, and tomato paste, cook for another minute. Pour in the broth and bring to a boil. Reduce heat and simmer uncovered for 15 minutes. Add the beans and simmer for another 15-20 minutes. Add half of the cornstarch slurry and check consistency to your liking. Add the other half if needed. Season with salt and pepper. Serve topped with sour cream.

Tuesday, January 31, 2012

Tinga Tinga


I'm certainly always on a Mexican kick. With the increasing crop of quality Hispanic markets around the West Lafayette area, it has become easier to source fresh and affordable ingredients for all my needs.  It's the food I truly miss from Arizona, the pure, unadulterated foods of Mexico.

Such is the case with this recipe for pork tostadas (or tinga, if you will). It's inspired from a recipe in Cook's Illustrated, who also seem to have something for Mexican food. It's a simple recipe, it makes enough for a large family or leftovers, and has additional uses such as fillings for burritos, tacos, etc.  I recommend getting your tostada shells from a Mexican market if you can. Make sure to look at the ingredients. It should read something like "corn, water, salt" or be less than five ingredients. If it's more, walk away. Just walk away. Quality is everything here people.


Shredded Pork Tostadas
Serves 6-8

3 pounds pork butt, trimmed and cut into 1 inch pieces
2 onions, 1 roughly quartered and 1 chopped
6 garlic cloves, 3 peeled and smashed and 3 minced
6 sprigs fresh thyme
2 tablespoons olive oil
1 teaspoon dried oregano
1 (15oz) can tomato sauce
1 1/2 tablespoons ancho chile powder
1 1/2 teaspoons cumin
2 bay leaves
1 cup water

For the tostadas
tostada shells
shredded cheese (queso fresco, cojita, or mild feta)
cilantro
sliced avocado
sour cream
salsa

In a large pot, bring pork, quartered onion, smashed garlic, thyme, 1 teaspoon salt, and 6 cups water to a boil over medium-high heat, skimming off any foam that comes to the surface with a spoon. Once boiling, reduce heat to medium low until simmering, partially cover, and cook until pork is fork tender, 70-80 minutes. Drain pork, reserving 1 cup of the liquid in a tall vessel (make sure to skim off the fat). Discard the onion, garlic, and thyme. Return pork to pot (no heat) and smash with a potato masher until roughly shredded. Set aside.

In a large skillet, heat the olive oil over medium-high heat. Add onion, cook for about 3 minutes, then add pork and dried oregano, mixing and then pressing the pork down into the pan to make the pork crispy. Cook, stirring occasionally (flip the pork over) until the pork is well browned and slightly crisp, about 10 minutes. Add the minced garlic and cook for 30 seconds.

Stir in the tomato sauce, reserved cooking liquid, chile powder, cumin, and bay leaves; simmer until thick and most of the liquid has evaporated, 10-15 minutes. Discard bay leaves, season with salt.

To serve, spoon pork onto tostadas, top with avocado (or guacamole), cheese, cilantro, and any other fresh toppings you desire. Enjoy.

Monday, January 16, 2012

Beef with Broccoli


You know what really bites?  Writing posts ahead of time, then falling behind on your blogging and the season changing.  There is no way I can say "it's a great time to grill" right now.  Well, put it in the can for next summer.

But it is a great time to stir fry!  Honestly, when isn't?  Need a quick meal on a weeknight?  Boom, stir fry.  Unexpected guests?  Boom, stir fry.  See where I'm going with this?  I'm sure a few of these recipes are going to be coming down the pipe as I'm into giving my wok a workout (wokout?).

Strangely enough, this recipe came to me via an email newsletter from my favorite local kitchen store, KitchenArt.  I modified it a bit for some spice, but it's a rather simple and extremely delicious recipe.  Besides Chicken with Almonds, it's the most frequent stir fry around my house.

Beef with Broccoli

1 pound flank steak, sliced thin against the grain
1 tablespoon soy sauce
1 tablespoon dry sherry (or rice wine)
1 tablespoon cornstarch
1 teaspoon sugar
1 large bunch broccoli, trimmed and cut into bite size pieces (you can peel and use the stems too)
1/4 cup water
2 cloves garlic, peeled and smashed
2 slices fresh ginger
3 dried arbol chiles (or other small spicy variety)
4 tablespoons oyster sauce
1 teaspoon + 1 tablespoon peanut oil
Cooked white rice

In a bowl combine the soy sauce, sherry, sugar, cornstarch.  Add flank steak and marinate 10-15 minutes.

Heat a wok or large skillet over medium high heat.  Add 1 teaspoon oil and heat until shimmering.  Add broccoli and cook until starting to brown, about 1 minute.  Add water, cover, and cook for 4 minutes or until broccoli is cooked.  Remove broccoli from pan and spread out in a single layer to cool (this is important as you want to stop the cooking process).

To the now empty wok add the remaining tablespoon oil.  Heat until shimmering and add the garlic, ginger, and chiles.  Cook until browned to infuse the oil.  Remove the seasonings (discard them) and add steak, breaking it up and cooking while stirring constantly until browned and cooked through, about 4-5 minutes.  Add broccoli and oyster sauce to combine, cook for 1 minute or until everything is hot.  Serve with white rice.

Tuesday, November 1, 2011

Costa Rica: Monteverde- Love at First Sight

Leaving Fortuna was bittersweet, but we were certainly ready for some rainforest. First off, I have to talk about the drive. Fortuna and Monteverde are actually pretty close to each other, it just so happens there's a giant lake in between them you have to drive around. And wow, what a drive, with the most awful roads I have ever driven on. Thankfully (or not) it was pouring, and the rain helped us identify all of the pot holes
We found a great place on the way called Mystica, a local hotel that also offered homemade pizzas with garden-fresh ingredients. It was delicious! Beautiful views and a very friendly cat were also found. Highly recommended.
When we finally reached Monteverde, we knew it was special. The town is focused on both tourism and farming, and felt much more like a town than a large resort. Everyone was super friendly and helped us find great places to eat and things to see. I highly recommend stopping in at the Frog Museum, which allows you to see many of the natural species found in the surrounding rainforests all at the same time.

Monteverde is full of great places to hike, bird watch, and really experience all of the Costa Rican beauty.  If you came looking for big and flashy, look elsewhere.  We took night hikes, toured coffee and sugar plantations, and learned about wonderful rare birds.
Likewise, the food we found was both simple and pure.  We had dinner one night at Chimera, an amazing tapas restaurant where every dish was wonderful.  I highly recommend the cassoulet and the patacones (fried plantains).  Also, make sure and get one of their fresh cocktails.  Really good.

We also tried out an Italian place (in case you didn't notice, there is a large international presence in the country).  They grow a lot of their ingredients (just like Mystica), and the fresh eggplant ravioli I had was wonderful.  The best thing you can do is trust the locals, our resource was Sylvia who worked at the hotel Montana (where we stayed and highly recommended).  She sent us to some great places, and it was easily the best part of our trip
Our last night we stayed in San Jose, and we both needed something a bit different, so we headed down south a few blocks to Tin Jo, a delightful Chinese restaurant that serves authentic Chinese and other Pan-Asian specialties.  We dined on tempura spring rolls and tasty hot and sour soup, followed by Pad Thai (for my wife) and kung-pao prawns (for me).  The Pad Thai was some of the best either of us had tasted, with a good amount of heat, perfectly cooked noodles, and a zing of fresh cilantro on the end.  The kung-pao prawns was served in a cassava edible bowl and had nicely cooked squash and peppers along with a spicy sauce to coat the prawns.  All in all it was one of the best meals we had while in Costa Rica.


Tuesday, October 18, 2011

Costa Rica: Fortuna-You Stole My Heart, Then You Stole My Stuff


Actually starting our vacation in Costa Rica, we left San Jose pretty early to get a jump out to Fortuna. The trip, in our endlessly scorned Suzuki Jimmy (I yearned for a Rav 4) was uneventful and full of twists, turns, and two lane roads. When we arrived at our hotel we were met with by an iguana who was out sunning himself. We stayed at the Tilajari resort, which was an amazing place but a bit far from most of our planned destinations.
We visited the Tabacon hot springs first, which came complete with lunch, which was nice (sea bass ceviche) but felt like a typical "spa" meal. They did serve some chayote on the side, which was delicious. It's a squash that's extremely common in that area of the world and to me tastes like zucchini with much better texture. Also, hot springs are fantastic and highly recommended.

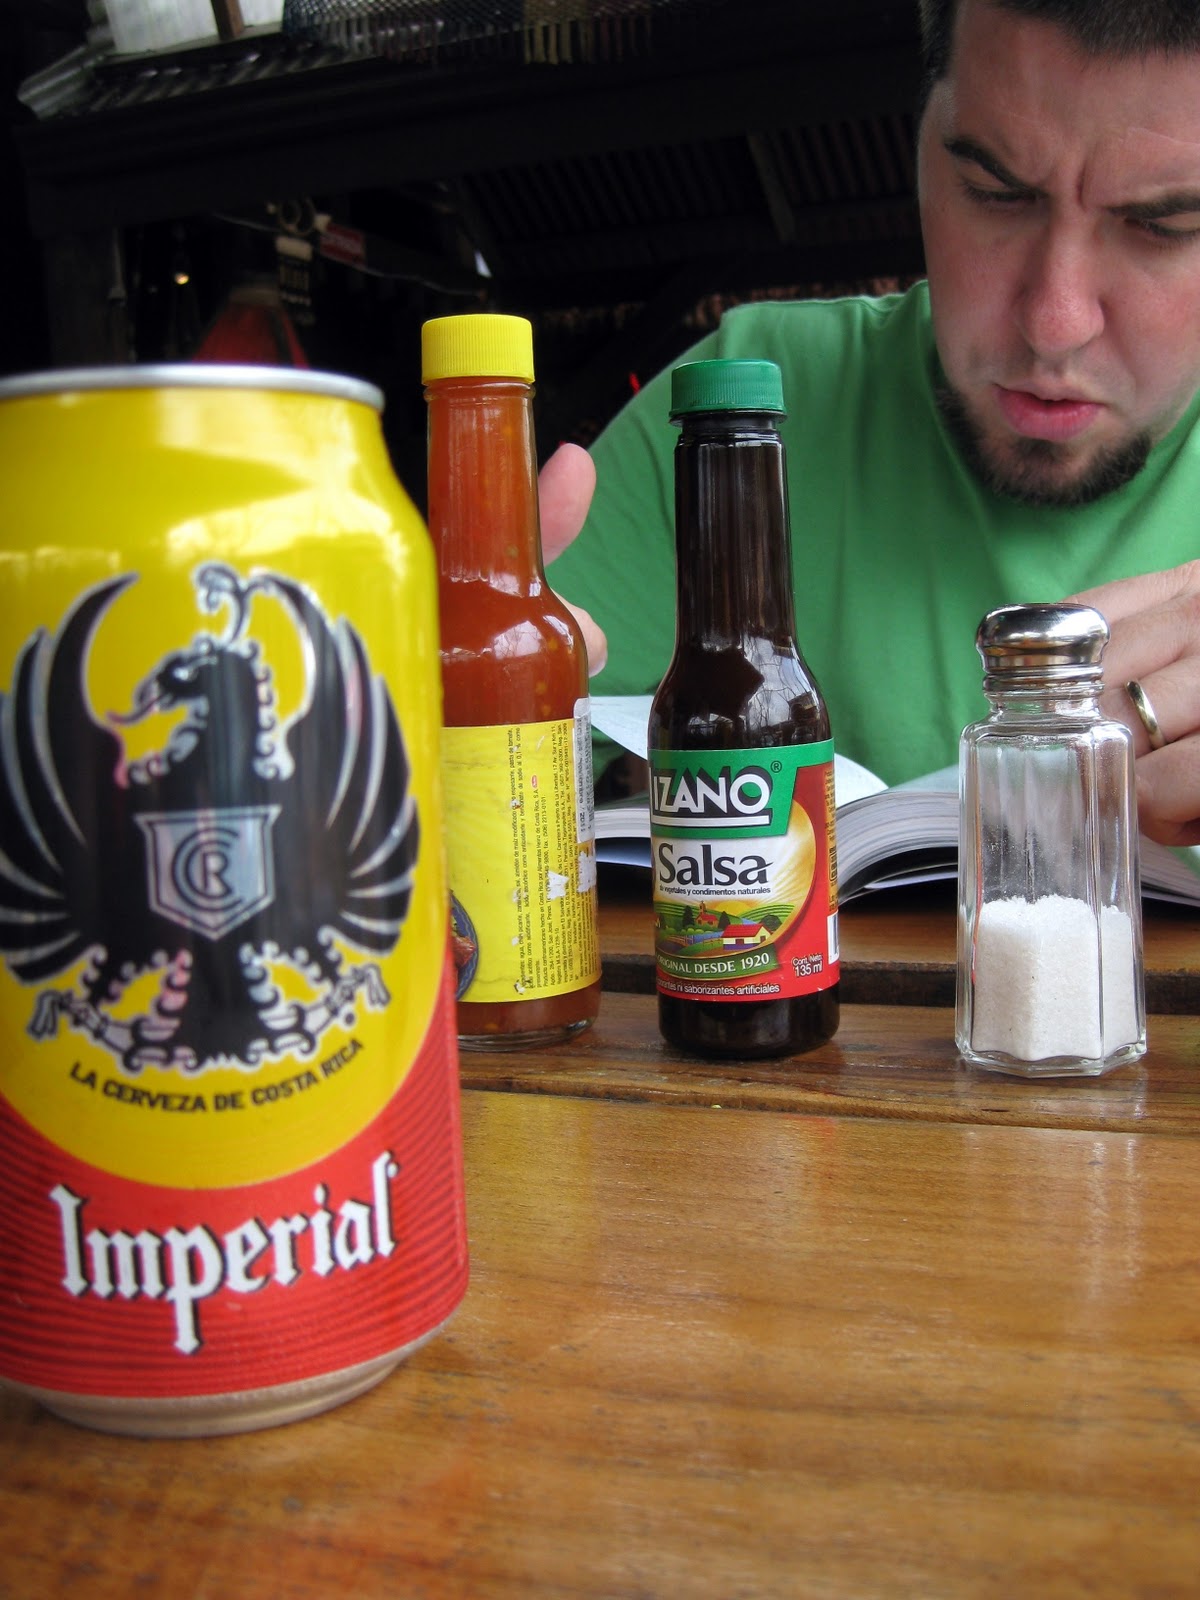
It rains a lot in the summer in Costa Rica, so most evenings are spent indoors eating and drinking. Costa Rica has a wonderful pilsner "Imperial", which I found was extremely refreshing after hot days, and also brews a darker ale called "". Both have a distinct fresh quality that most macro-brews in the states lack. And in case you are wondering, we did drink the water. And it was fine, and so were we.

We sought out Don Ruffino for dinner, a local place on the main drag in Fortuna. I specifically mention this place because it was so unbelievably delicious. I had Grandma's chicken, a half chicken marinated in a mole-style sauce and steamed in a banana leaf. Oh wow, was it tender and flavorful. Em had crab risotto with fish which was equally outstanding. And the dessert included strawberry beignets, which were as good as they sound.

I was really starting to like Fortuna! The next day we went hiking up the volcano and then zip-lining, which was one of the most exhilarating things I have ever done. Riding out 600 feet off the ground and seeing so much of the forest cannot be captured in simple words.
Then things started to go downhill. It started to pour during dinner, and I'm not just talking rain, I'm talking buckets. Dinner at La Chosa was awful; we went off a recommendation and found it to be a tourist trap complete with hilarious/awful drink choices and bland food. I'm also not a fan of elaborate garnishes (like cucumber flowers); I feel it adds nothing to my dish except price. Then we stopped to get a few souvenirs, only to return to our car two minutes later and find it had been broken into and our GPS stolen. Wow, what a turn of events. The police was super-unhelpful too, and it somewhat overshadowed most of our time in Fortuna.

My final thoughts about Fortuna are that it's a resort town, built up by people going to hot springs, but it has no other true industry, and has become somewhat of a party place with a seediness underneath. Monteverde? Never felt that, but here it seemed that there were two distinct towns living on top of each other, which led to an artificial resemblance of the entire place. I enjoyed some of my time, but if I return to Costa Rica, I won't be stopping by here.

More from the road, Monteverde, and a lot of birds tomorrow…

Wednesday, September 14, 2011

Costa Rica: San Jose- Get Out Fast!

We just got back from a week long trip to Costa Rica, and it truly a great and eventful trip. We traveled to three cities, so I'm breaking up the posts to cover the distinct locations.

We arrived in San Jose in the early evening, picked up our rental car, and inserted ourselves into an onslaught of traffic and poor directions. San Jose is a large city, and Costa Rica doesn’t believe in street signs or addresses. Most locations are either "between street x and y" or more often "across from restaurant z". Never in my life have I been as grateful for a GPS (or distraught from not having one, but those are spoilers). Also, the direction of the streets changes depending on the hour. Fun times.
We stayed in San Jose on both our first and last night in the country. My recommendation? Don't. There is not much in San Jose to see as a tourist aside from a few museums, and depending on your location the surrounding neighborhood may not be close to anything worth while. We stayed at the Hotel Balmoral, which was essentially an interior room with a bed. Like I said, not too much of note. One tip, don't change money at a hotel in the city. hotels in other cities and banks offer much better exchange rates. You can get buy with dollars in the city for a night.

The first night in San Jose we were feeling snacky, so we took a trip to the nearby bakery and ended up with these snacks, a coconut cake (bit dry) and a chocolate cake (which was ok).

The next morning, I quickly noticed how early everyone is out and about in the city. People selling fresh fruit and trinkets line the streets as early as 6am. We were eager to get out to our next stop, so we popped down for a quick breakfast in the hotel. Breakfast in Costa Rica is simple and filling. You can expect fruit, breads, eggs, lighter sausages, and their traditional dish, gallo pinto. Gallo pinto is a mixture of precooked rice, black beans, and spices or chiles. The one I had in San Jose was the best I had all trip, complete with some green onions and fresh chiles.

More from our trip to Fortuna coming next…

Monday, August 15, 2011

Maru Sushi


Maru Sushi is out of place in West Lafayette. I'm not saying we don't have good food around here, we do, but Maru, it's on another level. I've had sushi in on the east coast and the west coast, but Maru is consistently my favorite.

Let me make a declaration first, Maru does not dabble in the high end, super expensive tuna cheek you can find if you travel with Anthony Bourdain, rather, they make really good nigiri and rolls that you can find variations of throughout the country. They just do it better, and you can stuff yourself for $20 or less

I dined at Maru Sushi last Friday for date night with my wife. The meal begins with water, soda, sake, or hot tea. The tea is barley, and is great even in the summer. No matter what you get on the menu, you are always presented with a few small appetizers such as pickled daikon, bean sprouts in sesame oil, or cucumbers with chili sauce. You also get a small bowl of miso soup. For free! Who does that? I'm surprised Texas Roadhouse still gives us peanuts.

When perusing the menu at Maru, there are loads of choices to please the sushi-fanatic and the sushi-phobe. For sushi, their platters are quite good, but the rolls are where the good stuff is. Crunch munch, white castle, chauncy, and the dragon are some of my favorites. Each are prepared with artistic detail and have a combination of fish and sauces that make you want more.

There are also noodles, noodle soups, and a few tempura dishes on the expansive menu. One item you need to take note of though, is the kopdol bibimbap. You see, Maru also serves some Korean food. And this dish, this is what I go back for time and time again. It's white rice, shitaki mushrooms, spinach, carrots, bean sprouts, bulgogi (a marinated beef), and a runny egg on top, all served in a very hot stone pot. You add some homemade chile sauce on top and mix. The rice gets crispy from the hot stone, the chile and egg fuse to make a binding, rich sauce, and the plethora of vegetables are all wonderfully cooked. Hungry yet? I am. Best part, it's $10. That's it!

Maru is one of my favorite places to eat in town, for lunch or dinner. It gets quite packed around dinner time, so plan accordingly, or you can order takeout or even delivery if you're close by.

111 N Chauncey Ave, West Lafayette, IN
(765) 743-2646 ‎

5/5 Sheepdogs


For other restaurant reviews in the Lafayette, Indiana area, you can visit my dedicated page or Eat'n Local

Thursday, August 11, 2011

Just Jammin


It's year three of jam making at my house, and it's still just as much fun as it was the first time, though quite a bit less messy. Growing up, homemade jam was a treasure that arrived from my grandma ever so often. I always thought it was magical and must take days to make. I also believed in Santa, so what does that say?

Jam making is really easy. If you own a large pot and a dishwasher, you can make jam. Don't go out and buy all that fancy equipment, you don’t need it unless you plan on starting a canning business. The only special piece of equipment I recommend is a canning funnel, simply because it makes adding jam to jars much easier. Other than that you need some water, some tongs, a spoon, and preferably a partner who can help you set up an assembly line.

The key point to jam making is cleanliness. You boil your lids and utensils to prevent contamination, so after they are boiled, try not to touch anything except the clean jars.

Equipment
Mason jars, mason jar screw bands, mason jar lids (lids are not reusable)
Tongs
Big spoon
Small spoon (teaspoon)
Ladle
Canning funnel
Big pot
Slightly smaller pot
Kitchen towel
Wet paper towel

Blueberry-Strawberry Jam (adapted from a pectin insert)
Yields ~8 cups jam (do not double because pectin will not set, always make in smaller batches)

4 cups crushed fruit- This is about 4 pints of fruit, I usually split it down the middle between the two fruits, sometimes a bit heavier on strawberry
7 cups sugar
½ lemon, juiced
1 package liquid pectin

Wash jars in dishwasher. The best seal is hot jars with hot lids, so plan accordingly. In the smaller pot, fill ¾ full with water and add bands, tongs, ladle, small spoon, funnel, and lids. Bring water to just under a boil.

Cut up strawberries and lightly crush to achieve 2 cups crushed fruit. Crush blueberries to fill remaining two cups. Add to high-sided pot along with sugar and lemon juice. Heat pot over medium-high heat, stirring often with spoon until it comes to a rolling boil (it will expand, which is why you need the high sides). Add liquid pectin and return to a boil. Boil for 1 minute while stirring constantly and then turn off heat. Using little spoon skim off any foam off top.

Ladle hot jam into clean jars using funnel, filling to within 1/8 inch of top. Using tongs, carefully cover with flat lids, wipe any jam off sides with wet paper towel, and then place screw band over lid. Using the kitchen towel to protect your hands, screw bands on tightly. Invert jars for 5-10 minutes. After, turn jars upright to check seal. If lid springs back, the jar is not sealed yet and should be inverted for 10 more minutes. If it still springs back, the seal is bad and you must refrigerate the jam. Jam can be stored in a cool dark place for 1-1.5 years, and can be refrigerated open for 1 month.

Tuesday, August 9, 2011

Grilled Green Chile Chicken Pizza


It’s hot here. It's hot everywhere. It's that stretch of summer where I refuse to turn on my oven because it heats my house up by 25 degrees. No thank you very much. This leads to a lot of grilling, which I did plenty of this past weekend (along with some cold beer). Saturday night I was I was feeling pizza, which I normally make with fresh tomatoes from the garden, but those are still a few weeks away. I did have some leftover grilled sweet corn and fresh green chiles I pulled out of my garden.

As is apparent, from my Southwest roots I developed an appetite for all things green chile. This is no exception, and along with the delicious peak season sweet corn, it turned out fabulous. If you're in a pinch, you can use leftover roast chicken instead of grilling your own, but make sure to spice it before sprinkling it over your pizza.

Grilled Green Chile Chicken Pizza
Makes 3 16-inch pizzas

Dough (adapted from Alton Brown)
3 cups flour (16oz)
2 ½ teaspoons yeast
1 teaspoon salt
1 tablespoon olive oil
1 1/3 cups warm water

Sauce
4 tomatillos, husks removed
2 green chiles
1 tablespoon chopped cilantro
½ teaspoon sugar

1 pound boneless, skinless chicken breasts, pounded to even thickness
Salt and pepper
1 teaspoon cumin
1 teaspoon coriander
4 medium ears sweet corn, grilled or boiled, cut off the cob
6 ounces Mozzarella cheese

For the dough: Combine the flour and yeast in the bowl of a stand mixer. Start the mixer on low, using the hook attachment, and mix until the dough just comes together, approximately 1 1/2 minutes. Increase the mixer speed to medium and knead for 15 minutes. Be careful as your mixer may try to walk off the counter.

Tear off a small piece of dough and flatten into a disk. Gently stretch the dough until thin. Hold it up to the light and look to see if a see-through, taut membrane has formed. The dough will be quite sticky, but manageable. Fold the dough onto itself and form it into a smooth ball. Lightly oil the bowl of your mixer (olive oil or cooking spray). Place the dough in the bowl and roll it around to coat with the oil. Cover with plastic wrap and leave at room temperature to double in size, approximately 1 hour.

Split the dough into 3 equal, and then flatten each piece into a disk on the countertop. Form each piece into a ball. Roll each ball on the counter until they tighten into rounds. Cover the balls with a tea towel and rest for 45 minutes. While that's happening you can prepare everything else.

For the sauce: Preheat grill to high heat, grill chiles and tomatillos over direct heat, turning occasionally, until soft and charred. Let chiles cool for 5 minutes, remove skins, stems, and seeds. Place tomatillos, chiles, cilantro, and sugar in a food processor and blend until smooth. Adjust seasoning with salt and pepper

For chicken: Season chicken with salt, pepper, cumin, and coriander. Place on grill and cook, lid down, for 4 minutes. Move chicken to cooler part of grill (keep main burner on high but keep chicken off of direct heat) and grill, lid down, until chicken reaches internal temperature of 165°F, abut 5-6 minutes. Remove from grill and rest for 5 minutes. Shred with fork.

Assemble: Return all burners to high on grill, close lid. Lightly flour the countertop and flatten 1 of the dough balls. Use a rolling pin to roll the dough into a 16-inch round, rotating the dough as you go. Transfer the dough to a lightly floured pizza peel and stretch to re-shape if necessary (it will likely shrink so you may need to let it rest and then roll it out a bit more).

Oil grill grates and turn all burners to medium. Brush the dough with a small amount of olive oil and flip onto the hot grill. Close the lid and cook until the bottom of the crust is golden brown, 1-2 minutes. Brush the top side of the dough with a small amount of olive oil, then immediately flip using the peel or tongs. Spread 1/3 of the sauce over the pizza, sprinkle 1/3 of the chicken and corn followed by 1/3 of the cheese. Close the lid and cook until the bottom of crust is golden brown and the cheese has melted, another 1 to 2 minutes. Using the peel, remove the pizza to a cooling rack and let rest for 3-5 minutes before slicing. You can also hold them in a warm oven set to 200°F. Repeat with remaining pizzas and enjoy!

Tuesday, August 2, 2011

DIY Fruit Spirits


After reading a magazine article about making flavored alcohol, I gave it a whirl.  I don't know why I never did this before!  Making my own infused spirits was not only easy, it was delicious!  I now have a rotating supply of spirits in my refrigerator depending on what's in season and on sale at the store.

The above picture uses strawberry vodka, and I also have peach and blueberry versions in the fridge at the moment.  It's rather simple

You need:
A clear spirit such as vodka or rum
fruit
mason jar

Cut the fruit into 1 inch pieces, or if using blueberries, give them a light mash.  Place in mason jar, cover with the desired spirit, screw the lid on, and give it a few gentle shakes.  Keep in the refrigerator and invert to stir every 2-3 days.  Most are ready after 2 weeks depending on how much flavor you want to infuse.  Strain off the fruit into a clean jar.  Keeps...well, I'm not sure, I usually run out before then.

For strawberry, I recommend a simple spritzer.  Juice half a lime into a class, add 2 ounces strawberry vodka, and top with soda water.

For peach, you could try Peach Sangria from one of my fellow bloggers over at "What's Cookin'"

I'm hoping I can work the blueberry into some sort of martini.  Ideas?